Showing posts with label DIY. Show all posts

Painted Mason Jars & Flower Pots DIY

Tuesday, September 27, 2016

Hello, hello! I don't know about y'all but in San Antonio we have been getting POUNDED with rain! It took me an hour and a half to get to work Monday due to all the road closures and detours. I am happy about the (slight) cool front that accompanied this storm, but it better clear up by this weekend! (It's my birthday <3) I was planning on re-potting several of my plants, but the weather had other plans so instead I settled for an easy DIY I've been planning to do for a while. Painting is so therapeutic for me, especially when it's something simple and for fun. This way I'm not worried about messing up or not getting something perfect. No pressure, just paint! 
 
You can find these painted Mason Jars all over Etsy for various prices. My mom bought a couple sets for the bathrooms from a lady and that is where I first saw them, so I can't take credit for this idea. But I thought, my goodness how simple and people are paying $40 for a set. You can buy an entire set of Mason Jars for like $8 at the grocery store. Use some old paint or buy some for a few bucks, add some twine and you've got the same thing! 

I use these to hold my toothbrush, makeup brushes, sponges and bobby pins. These would make super cute pen holders (teacher friends hi!) or vases. Throw in your Q-tips and cotton pads. Stick a candle in the bottom. Plant a super cute cactus or use them as a wedding centerpiece! So many possibilities and it's sooooo easy.

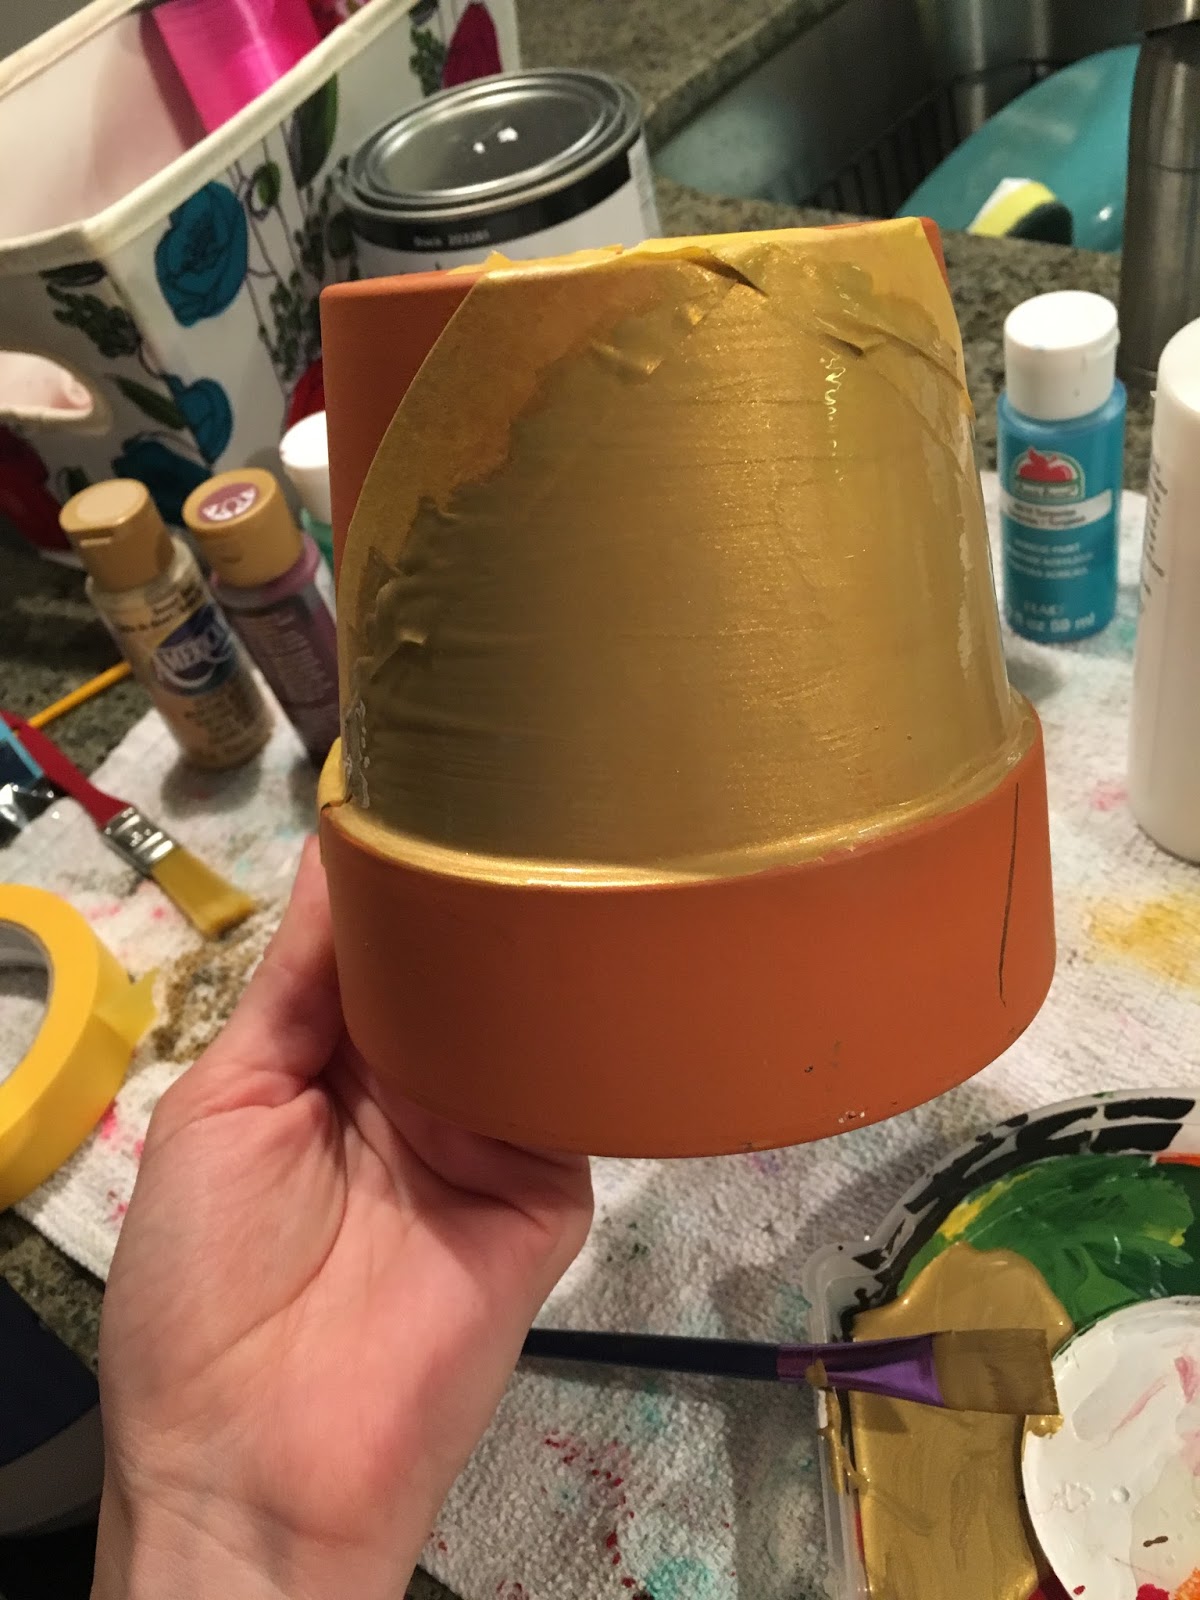
 And while I had my paint out, I decided to paint my boring clay pot and give it some personality. I used painters tape to mark off some triangle shapes. Then I went in with a couple of coats of metallic gold. Lastly I added some turquoise because why not?!

Here are all the paint colors I used. I mixed white with the Royal Violet to get a pastel color.
 

POTS


 It's not perfect, but I like that because it gives it personality. This is a Fittonia. Also known as a Nerve Plant or Angel Plant. I love the pink leaves!
Sorry for the blurry pictures! I was trying not to get paint everywhere. 


MASON JARS

Remove the screw-lid from your jars unless you want them painted too. 


Paint on the outside. I find putting them upside down is the easiest way to do it. 
See the tiny jar? That's from a garlic container! Haha. Just make sure to wash whatever jars you reuse.


I will probably use these both for plants! If I was doing a bathroom set or desk set I would use one solid color for them all, like my bathroom set below!


After they dry, sand over the brand name gently to get the worn affect. I did not use any primer or sealer for these for this reason. I like them to look a little old. Add a bow with twine or burlap. Boom, done! So cute for so many possibilities. Andddd the chalkboard obsession continues! I made this on a wood round then hot glued some twine to the back. I think these are much more practical and cuter when they are hangable! I use chalkboard markers from Hobby Lobby. They don't come off as easy as chalk but they are way easier to write with and look much bolder. If they don't come off well you can always paint over! Obviously my leaves need some work! Haha. I hope you liked this post and feel inspired to get creative and do some relaxing of your own! Happy Tuesday!

XXXX

Lindsey


Preserving Pumpkins For Fall Decor

Monday, September 26, 2016

Last Thursday was the first day of fall and I welcomed the season with open arms. Hobby Lobby has had all fall and Christmas decor on 40% off for quite some time now. I picked up a cute scarecrow door hanger for only $12. But my favorite way to start decorating for fall, is by using real pumpkins and gourds. You can get a bag of the gourds like I used for $5 at HEB. I also was so excited to see new pumpkins this year. There are "pink" pumpkins like I got and dark green as well. I love the pink because it looks like something straight out of Cinderella. But it still has a peach/orange tint to it so that you don't stray too far away from true fall colors. If you have a pumpkin patch or farmers market nearby you can probably find even better deals and more options. I don't plan on carving these pumpkins, just setting them out for decoration. If you do plan on carving I would recommend waiting until about two or three weeks before Halloween since the carve pumpkins will decay much faster. 

Left alone. the pumpkins and gourds will last much longer. These are the steps I use to preserve my pumpkins and gourds to help slow down the rotting that I found on this blog through Pinterest. 


You will need: 

Pumpkins/gourds

Bleach

Vaseline

Towel or washcloth

Tub or large sink 

 Aside from the pumpkins, you most likely have everything else at home already.

Fill your tub or sink with 10 parts water 1 part bleach and let your pumpkins soak for 5-10 minutes. Don't overdo the bleach or it will eat away at the skin of your pumpkins.
 

 Wear gloves if you have them so that the bleach does not irritate your skin. You may have to push or hold the small ones under. After 5-10 minutes, let them air dry.


If you plan to paint your pumpkins, skip the next step and go straight to painting. The colors are mine were gorgeous, so I chose to leave them their natural colors.  


With a washcloth or paper towel, buff each pumpkin/gourd with a little Vaseline to moisturize the skin and give it a pretty shine. If there is excess or they are slippery, wipe them down with a clean cloth or paper towel. You don't want them to be sticky or slippery.

And then you're done! Your pumpkins are now clean and shiny and ready to be put to use. I use mine as a centerpiece for my living room table and as random decor around the house. If you follow me, you have probably noticed I have been on a chalkboard paint kick. I picked up this chicken wire/chalkboard hanger at the Round Top Antique Fair last year. It has been loaded down with pictures and memories but I never got around to writing or drawing anything on the chalkboard side. Here's what I ended up doing! I'm pretty pleased with how it came out. I hope you found this post useful and happy fall y'all!

XXXX,

Lindsey

Magnolia Wreath Dupe

Friday, September 23, 2016

I love Fixer Upper! I mean what girl doesn't?! Chip and JoJo are just plain adorable and the houses and decor they create are what Pinterest dreams are made of. One of my favorite pieces is the Signature Magnolia wreath. Often styled layered over an old window pane or some type of frame. (Haha that rhymed) Also great as a clean and simple door hanger appropriate for any season.  I love this wreath, but JoJo, girlfriend, $95 for a circle of leaves?! I don't think so. So I found some amazing dupes for half and a quarter of the price for you Fixer Upper fans! I personally love the Hobby Lobby one, and right now it is on sale for $25!! Seriously, so much more reasonable. I also found so many great ones on Etsy. If you're more of a do-it-yourselfer and up for some crafting, I linked a super easy and cheap DIY as well! Enjoy!


$95 


$50 on sale for $25 during half off floral sale for a limited time!


$38


$40


$55


And if you really wanted to be cost friendly, here is a great and simple DIY for a $10 Magnolia Wreath! 

If anyone attempts the DIY, send me your pictures! :) Thanks for reading and have a fantastic weekend!

XXXX
Lindsey 

Saving Succulents from Rot

Wednesday, September 7, 2016

You are going out of town for a week or two, so you think let me give my plants a good soaking to make up for the time I'll be gone. Even though you just watered them two or three days ago. Fine right? For an ivy or flowers...sure, but cactus are a totally different story. Cactus really should only be watered after their soil has completely dried out. I water mine about once a week, no more. Cactus do not like to be constantly wet as it can lead to rot. Rot = death to your plant. BUT sometimes if you catch it early on enough you can save them!

This little guy was in a pot of three different cacti and I guess the other two were much more durable. Sometimes it's hard to read what your plant babies are trying to tell you. This guy started to get brown but was not mushy so I assumed he was getting sunburned and gave him more water. A couple days later he was squishy at the base and his little arms were coming off and I realized he was rotting. It's so sad when this happens and I feel like a failed mother but I always try to salvage plants when this happens.

First, dig up the entire plant, roots and all. It's important that you dig out all of the plant so that no nasty rot is left behind, especially if your cactus shares its home with others. Throw out whatever parts are brown and squishy. But save anything that still looks normal. Mine disconnected from the roots so I dug those up and got rid of them.

With a clean knife or pair of scissors, assess what part of plant the rot ends at and cut off all of the dead parts, leaving a nice, fresh cut where the healthy plant begins. For mine specifically I had to take each little arm off and cut off the bottom of all of the stalks. Do this for all healthy pieces, no matter how small! You can see how I had to take off one more slice since there was still rot left after my first cut.

Now set aside your cuttings in a dry and sunny area. Outside somewhere covered or in a windowsill is ideal. You don't want any moisture getting on these guys. Let the cuttings sit for a few days until they develop a dry, solid callus over their cuts. Once they are completely dry you can reintroduce them to soil. No need to completely plant them, just let the tip of the plant slightly push into the soil. Do not water them for at least another week after this. If they decide to take again they will sprout roots and do their own thing. The best thing to do is leave them alone. I have had plants re-root in weeks and some did nothing for months and then suddenly planted itself again. It's pretty fascinating!
I will update this post if there are any improvements to this guy! Thank you for reading, don't forget to subscribe so that you can stay updated on this little dude's recovery!

XXXX,
Lindsey

DIY Tassel Garland

Sunday, August 21, 2016


I am so excited to for this DIY! About two years ago I found a tassel garland on Etsy. I think I probably paid $30-$40. Shudder. Little did I know just how EASY these are to make yourself, and for less than $10. I purchased one for my bedroom, and made one for a girl's trip, but these are so cute for birthday parties, baby showers, and bridal showers. The best part about making your own, is you can completely customize the colors and length to your liking. I made this one for the mimosa bar at our girl's weekend beach trip. I really liked a flag sign I found on Pinterest that said bubbly bar, but I wanted to incorporate some color, so for this garland I combined flags and tassels. The flags came in a pack at Hobby Lobby and I used a chalk-board marker on the gold flags. You could do just tassels for a really cute way to add some color to your room, hang pictures in-between the tassels with clothes pins, or tie one end to a bunch of balloons at a party. There are so many ways to get creative with this and truly make it your own. I honestly was intimidated by this DIY and thought it would be so tedious and time consuming, but I ended up only spending about two hours total on this project. 

Supplies:

Tissue paper in color of your choosing (regular, metallic, or both!)
Wire or cord
Hot glue gun
Scissors

Steps:

I chose to do one color at a time. So pick whichever color you want to work on first and unfold the whole pack of tissue paper, but leave them stacked. 

Fold the entire pack of tissue paper in half, long ways or "Hot Dog" style.
Cut strips of the same width, leaving about an inch of space left at the top. You can cut all at once or if its too thick you can open your sheet and cut one side at a time toward the fold. Just make sure you are leaving a solid inch in the middle. 

In the top picture with the mint tissue paper you can see the ideal amount of space to leave. In the bottom picture with the pink tissue paper you can tell I cut too close. Try to make all the strips consistent in size, but don't freak out if they aren't perfect. I'm left handed so anytime I cut things it ends up looking a little sad, but once you see the final product it really is not noticeable.
Once you have finished cutting, make sure all the tassels are folded down as shown above.Next, fold the entire strip in half two times.Roll the strip until it forms a tassel, shown below. 
If you chose to use wire, wrap around the top portion of your tassel a couple times, form a loop, and continue wrapping until the top is secure. Be sure the loop is secured under your wrap and won't come loose.
 If you chose cord, tie a secure double-knot around the top of the tassel, making sure to leave a few inches of extra cord on your loose end, as shown below. This extra string will be used to form your loop. Leave the other end still attached to your roll of cord. After you have made a knot, take the excess cord and form a loop over the top of the tassel. While holding it in place, wrap the attached side of the cord over this and around the top multiple times until you feel that it is secured. Hold down the end of your string and hot glue it down. I'm sure there are better, prettier way to do this, and wire may be preferred so no glue shows, but this is what I found easiest. Let those babies dry!
When you are done you should have cute little, hang-able tassels!

Lastly, loop each tassel through your cord or wire in whatever pattern you like. Add in whatever you want! (The pic below is a store bought one)
And DONE! Hang it up above your bed, use it for table decor at a party, or these would even make super cute classroom decorations. I am going to try a patterned tissue paper and a metallic gold tissue paper on the next one I make. Send me pictures if you try this DIY! As always, thank you so much for reading! Feel free to always share my posts on Facebook or Pinterest. There is a "share" button at the bottom of every post that will let you share to any social media platform. If you have any questions you can leave a comment below or email me in the sidebar. And don't forget to subscribe! :)

PSA: Your living room may end up looking something like THIS until you are done. Haha!
 All photos are my own.
Made With Love By The Dutch Lady Designs