Showing posts with label Garden. Show all posts

My Birthday: Ft. East Austin Succulents & 2Tarts Bakery

Friday, October 7, 2016

Hi guys! I know I have not been posting as much lately. October is such a busy month for me! It seems October-December are always a blur of events and celebrations. Small town festivals, birthdays, and weddings...the list never ends! I am actually pretty relieved that this weekend should be relatively calm. I promise I am going to keep writing, but it may not be as often as the three times a week posts I was pumping out in the past. But hey, quality not quantity, right?!
Last weekend I turned 24. Sorry...that still looks weird to type! 24!! I'm sure most of you are rolling your eyes at me right now. "Twenty-four is still so young!" Well, I'm sure it is but I remember when I was 16 what 24 looked like. It looked like marriage and a super important business job. It looked like a house and a baby and two dogs, maybe a cat and so much more. Now, I'm not saying there is anything wrong with that at all, but let me just say that I am SO happy that 24 turned out to be a whole lot simpler than that. I am grateful to have completed college, landed a job with a company I love, solidified true friendships, met a great guy, and become a (for the most part) independent adult.

I am a serious planner. I love a detailed, fully planned and researched schedule. I don't like not knowing what to wear or expect or how much time I have to do something. So I always overwhelm myself with trying to plan out every detail of my birthday. I try to include as many of my friends or loved ones as possible. And with a huge family and spread out friend group that I feel should all be included, it ends up being a complete mess. So this year I decided I was not going to plan a single thing. And you know what? It ended up being the absolute best birthday I've had in a while. Of course there are plenty of people I would of loved to see, but we are adults now with busy lives and I know that they were still thinking of me. I was blown away by all the thoughtful gestures and calls and messages I received. My boyfriend played a huge part in my weekend. He planned out the entire weekend and truly has paid so much attention to my interests. Y'ALL. HE TOOK ME TO A SUCCULENT SHOP. But I won't drag on anymore, the main reason for this post was I wanted to highlight two of my favorite parts from the weekend. Not only because I enjoyed them so much, but because they are local, Texas businesses I've had my eye on a long time and I can finally attest to how great they really are.

2Tarts Bakery  

I stumbled upon 2Tarts Bakery on Instagram and was instantly in love with their cakes. I thought no way that this place was close by, these are the type of cakes you see on Pinterest and drool over. But to my great pleasure they are located right in New Braunfels. I've wanted to visit their bakery for at least two years but I seem to always be passing through New Braunfels instead of stopping in. I casually mentioned to my boyfriend, Wilson, one day months ago that the onlyyyy thing I really wanted for my birthday was a cake from 2Tarts. I'm pretty sure he gave a "yeah" response and I knew he had no clue what I had just said. Uhhh wrong, he surprised me with a cake from there covered in CACTUS AND SUCCULENTS. Obsessed is an understatement, this thing was adorable! The appearance of the cake honestly needs no further comment. The pictures say it all, and even those don't completely do it justice. As far as taste, it was a red velvet cake with cream cheese and buttercream icing. Yuuuuuuuummmmy. It was super rich, but so delicious! I will definitely be visiting the actual bakery soon for a cupcake or treat. Check out their Instagram to see all of their amazing cakes, you may just seen mine as well. :)


 East Austin Succulents 


 The first place we went on Saturday was East Austin Succulents in Austin.This was another place I have been dreaming of visiting for a long time. I wasn't sure how big it would be or how pricey, but my expectations were blown out of the water. It's not exactly in the nicest area, so female friends I would not visit alone. Of course at the store itself I felt completely safe, but the surrounding area was a different story. East Austin Succulents is actually conjoined with another plant shop, which I did not realize, but you can walk around the two altogether. Think TJ Max and Homegoods, lol. There are gorgeous pre-made arrangements, 2 inch plants, plants bigger than me, rows and rows of anything your heart desires. They had the neatest collection of rare grafted plants. Now the grafted plants were a bit pricey due to their novelty but with regular succulents and cacti you could get 6 plants for only $10! They also sell containers of every shape, size, color, material and design you could ever think of if you want them to make an arrangement for you. I chose a gold and white striped ceramic container that was so pretty. Next time I will bring my own! Then I picked out six little guys and they potted and arranged them quickly with expertise. They used kitchen and medical tongs to grab the cacti and I am so bewildered that I never thought about using something like that before! They had plants growing out of everything too! I posted a lot of pictures but one I forgot to take was plants coming out the bottom of a water fountain! The employees were so friendly and knowledgable. I will definitely be visiting again. OH, and if you spend over $40 you get to spin a giant wheel to win something. I got a free plant that ended up really pulling together my arrangement. It was the little spikey guy in the middle! And they added a pretty crystal. If you love plants as much as me you must go! It was heaven and I wish there was something similar to it in San Antonio!


I hope everyone has an excellent weekend! Let me know what your favorite little places are! Thanks for reading, and don't forget to subscribe!

XXXX
Lindsey 

Painted Mason Jars & Flower Pots DIY

Tuesday, September 27, 2016

Hello, hello! I don't know about y'all but in San Antonio we have been getting POUNDED with rain! It took me an hour and a half to get to work Monday due to all the road closures and detours. I am happy about the (slight) cool front that accompanied this storm, but it better clear up by this weekend! (It's my birthday <3) I was planning on re-potting several of my plants, but the weather had other plans so instead I settled for an easy DIY I've been planning to do for a while. Painting is so therapeutic for me, especially when it's something simple and for fun. This way I'm not worried about messing up or not getting something perfect. No pressure, just paint! 
 
You can find these painted Mason Jars all over Etsy for various prices. My mom bought a couple sets for the bathrooms from a lady and that is where I first saw them, so I can't take credit for this idea. But I thought, my goodness how simple and people are paying $40 for a set. You can buy an entire set of Mason Jars for like $8 at the grocery store. Use some old paint or buy some for a few bucks, add some twine and you've got the same thing! 

I use these to hold my toothbrush, makeup brushes, sponges and bobby pins. These would make super cute pen holders (teacher friends hi!) or vases. Throw in your Q-tips and cotton pads. Stick a candle in the bottom. Plant a super cute cactus or use them as a wedding centerpiece! So many possibilities and it's sooooo easy.

 And while I had my paint out, I decided to paint my boring clay pot and give it some personality. I used painters tape to mark off some triangle shapes. Then I went in with a couple of coats of metallic gold. Lastly I added some turquoise because why not?!

Here are all the paint colors I used. I mixed white with the Royal Violet to get a pastel color.
 

POTS


 It's not perfect, but I like that because it gives it personality. This is a Fittonia. Also known as a Nerve Plant or Angel Plant. I love the pink leaves!
Sorry for the blurry pictures! I was trying not to get paint everywhere. 


MASON JARS

Remove the screw-lid from your jars unless you want them painted too. 


Paint on the outside. I find putting them upside down is the easiest way to do it. 
See the tiny jar? That's from a garlic container! Haha. Just make sure to wash whatever jars you reuse.


I will probably use these both for plants! If I was doing a bathroom set or desk set I would use one solid color for them all, like my bathroom set below!


After they dry, sand over the brand name gently to get the worn affect. I did not use any primer or sealer for these for this reason. I like them to look a little old. Add a bow with twine or burlap. Boom, done! So cute for so many possibilities. Andddd the chalkboard obsession continues! I made this on a wood round then hot glued some twine to the back. I think these are much more practical and cuter when they are hangable! I use chalkboard markers from Hobby Lobby. They don't come off as easy as chalk but they are way easier to write with and look much bolder. If they don't come off well you can always paint over! Obviously my leaves need some work! Haha. I hope you liked this post and feel inspired to get creative and do some relaxing of your own! Happy Tuesday!

XXXX

Lindsey


Saving Succulents from Rot

Wednesday, September 7, 2016

You are going out of town for a week or two, so you think let me give my plants a good soaking to make up for the time I'll be gone. Even though you just watered them two or three days ago. Fine right? For an ivy or flowers...sure, but cactus are a totally different story. Cactus really should only be watered after their soil has completely dried out. I water mine about once a week, no more. Cactus do not like to be constantly wet as it can lead to rot. Rot = death to your plant. BUT sometimes if you catch it early on enough you can save them!

This little guy was in a pot of three different cacti and I guess the other two were much more durable. Sometimes it's hard to read what your plant babies are trying to tell you. This guy started to get brown but was not mushy so I assumed he was getting sunburned and gave him more water. A couple days later he was squishy at the base and his little arms were coming off and I realized he was rotting. It's so sad when this happens and I feel like a failed mother but I always try to salvage plants when this happens.

First, dig up the entire plant, roots and all. It's important that you dig out all of the plant so that no nasty rot is left behind, especially if your cactus shares its home with others. Throw out whatever parts are brown and squishy. But save anything that still looks normal. Mine disconnected from the roots so I dug those up and got rid of them.

With a clean knife or pair of scissors, assess what part of plant the rot ends at and cut off all of the dead parts, leaving a nice, fresh cut where the healthy plant begins. For mine specifically I had to take each little arm off and cut off the bottom of all of the stalks. Do this for all healthy pieces, no matter how small! You can see how I had to take off one more slice since there was still rot left after my first cut.

Now set aside your cuttings in a dry and sunny area. Outside somewhere covered or in a windowsill is ideal. You don't want any moisture getting on these guys. Let the cuttings sit for a few days until they develop a dry, solid callus over their cuts. Once they are completely dry you can reintroduce them to soil. No need to completely plant them, just let the tip of the plant slightly push into the soil. Do not water them for at least another week after this. If they decide to take again they will sprout roots and do their own thing. The best thing to do is leave them alone. I have had plants re-root in weeks and some did nothing for months and then suddenly planted itself again. It's pretty fascinating!
I will update this post if there are any improvements to this guy! Thank you for reading, don't forget to subscribe so that you can stay updated on this little dude's recovery!

XXXX,
Lindsey

DIY Succulent Jar Planters

Friday, July 29, 2016


If you haven't already, read my post on how to care for succulents first!
The first type of cactus to ever catch my eye was the colorful Moon Cactus.


They look like alien flowers! You can find them easily in the garden sections of Lowe's, Home Depot, Walmart, or most plant nurseries. (If you are here for the DIY only and don't want a mini science lesson you can skip this next paragraph)

What most people don't know is Moon Cactus, or gymnocalycium mihanovichii friedrichii, is actually composed of two different plants. The top part of the plant that you see in bright shades of pink, red, yellow, orange, and sometimes, purple, gets its bright color because it lacks chlorophyll. You might remember from science class that chlorophyll is what makes a plant green. Since they lack chlorophyll, the top portion of the plant is unable to produce the chemicals it needs for photosynthesis and cannot survive on its own. In order to survive, it has to be grafted onto another cactus. So the green "stem" part on the bottom is basically the real MVP that allows us to have these adorable little cacti.

Supplies:

  • Moon cactus of your preference 
  • Cactus soil
  • Sand (you can buy tiny bags of sand at Lowe's for cheap!)
  • Gravel or tiny rocks (also sold in tiny bags at Lowe's AND some dollar stores) aquarium rocks are ok too!
  • Glass jars
  • Paper cord ribbon or twine


I bought my plants, sand, and soil at Lowe's. Everything else I got at Dollar Tree. Side-note... I grew up with only Dollar General where everything is most certainly not the price of $1. But at Dollar TREE, EVERYTHING IS A DOLLAR. Madness. Anyways, moving on.

  • First fill your jar about one to two inches with any kind of sand. I chose fine, because it looks prettier to me. 
  • Next, you have the choice to either do another layer of gravel, or you can mix your soil and gravel. I chose to mix. 
  • Depending on what size jar you used, you may or may not need to add some soil before putting your plant in. I chose tiny jars, because everything is cuter when it's tiny. 
  •  Take your plants out of their plastic cups at this point. Go ahead and knock off any excess dirt leaving only what clings to the roots. 
  • Nestle your plant into the jar and get it positioned how you like. 
  • After this, start to pour in your soil, or soil and gravel mixture, around each side of the plant and knock the dirt down to the bottom so that there are no gaps. Keep pushing the soil down until its completely packed or else your plant will shift when you water it. 
  • After it's filled, dust off any excess soil on the plant or around the jar. Moon cactus are prickly, but they don't have sharp needles that will stick in your hand.
  • Take the paper cord ribbon or twine of your choice and cut it to a length to where it will wrap around your jar three times. Wrap the ribbon or twine around twice then tie into a bow and cut off any excess length. And you're done! Seriously so easy.
 For more details on how to care for these plants, read my post linked at the top. It is really important that you not over-water these since there is no drainage hole in the jars.

These are so easy and inexpensive to make. They are great for cute pops of color in your home or on your desk and they make great gifts. I made some for mother's day and they were a hit. It's like giving someone flowers only they won't die after a week. I also think it's really neat that you can see all of the roots spiraled around the soil.

Let me know in the comments if you loved this post and would like to see more DIYs or plant posts, or if you died of boredom and despair. Thanks for reading!

Cactus Care

Monday, July 18, 2016

I am so excited to do this post! If you know me personally or follow me on Instagram, then it should be no secret to you that I adore my succulents. I wasn't sure this would be a topic of interest, but I actually have gotten quite a few requests for it. Lately I have noticed a surge in their popularity as decor. A lot of places have even begun selling fake plastic and rubber succulents. I find that hilarious because these are literally the easiest plants in the world to care for as long as you know how to care for them. I went to Florida for a week and my babies are all still perfectly healthy. Cactus and succulents are inexpensive, but that doesn't mean you don't want them to last. A lot of people get captivated by the aesthetic of cactus and succulent plants and fail to do any research on how to care for them. And I was totally one of those people! I was basically like OMG HOW CUTE, I WANT THEM ALL. Bought about six plants, shoved them in a giant pot of soil, and watered them daily. If you know anything about these plants you're probably cringing. Why? Well after about a week or two of watering these babies they all promptly DIED. And by died I mean turned to complete disgusting and depressing, unidentifiable mush. These plants are SO easy to over-water and over-watering leads to rot, or well...mush. But don't take that info and run with it thinking this low maintenance plant can be ignored for a year with no water or sunlight in your dark bedroom either.

R.I.P. 


What's the difference between a cactus and succulent?

So first things first, let's talk about the difference between the two. All cacti are succulents, but not all succulents are cacti. A lot of people, myself included (even in the title of this post!), are guilty of using the terms interchangeably. The main way to distinguish between the two is look for the small circles called, aureoles (hehe), where their spines, spikes, needles, fuzzies, or even flowers grow out of. Succulents that are not cacti are more fleshy, smooth, and leafy. If you're curious about the details, this article explains the differences really well!

 Check out her flower crown :) 


Where can I buy succulents?

You can find them easily in the garden sections of Lowe's, Home Depot, Walmart, or most plant nurseries. If you live in Texas, I have heard great things about East Austin Succulents! I'm hoping to make a trip there before the end of summer. If you are looking for a more rare or specific type of succulent you can actually order them online. There are some really cool arrangements on Etsy.
When you are buying them, use common sense to determine if they look healthy. Check for scarring or broken leaves, tiny bugs, or rot. If they are mushy looking they have been over watered and are beginning to rot. Avoid these plants. The best part about succulents and cacti is that they are generally very inexpensive. So don't fret if you kill off a couple of your first ones, I did the same, but they are replaceable.

A lot of these stores will sell succulents that are already nicely arranged in a pretty pot or container. If you aren't the type to get your hands dirty and are willing to pay a little extra, go for it! That takes out all the work, but to me arranging my own little plant groups is the fun part. If you choose to go with a ready to-go succulent arrangement my main advice would be to check for drainage holes on the bottom of whatever container they are in. You really want good drainage for your plants or else you need to have some sort of layer of gravel or sand at the bottom to help with drainage. More on that later.


Potting

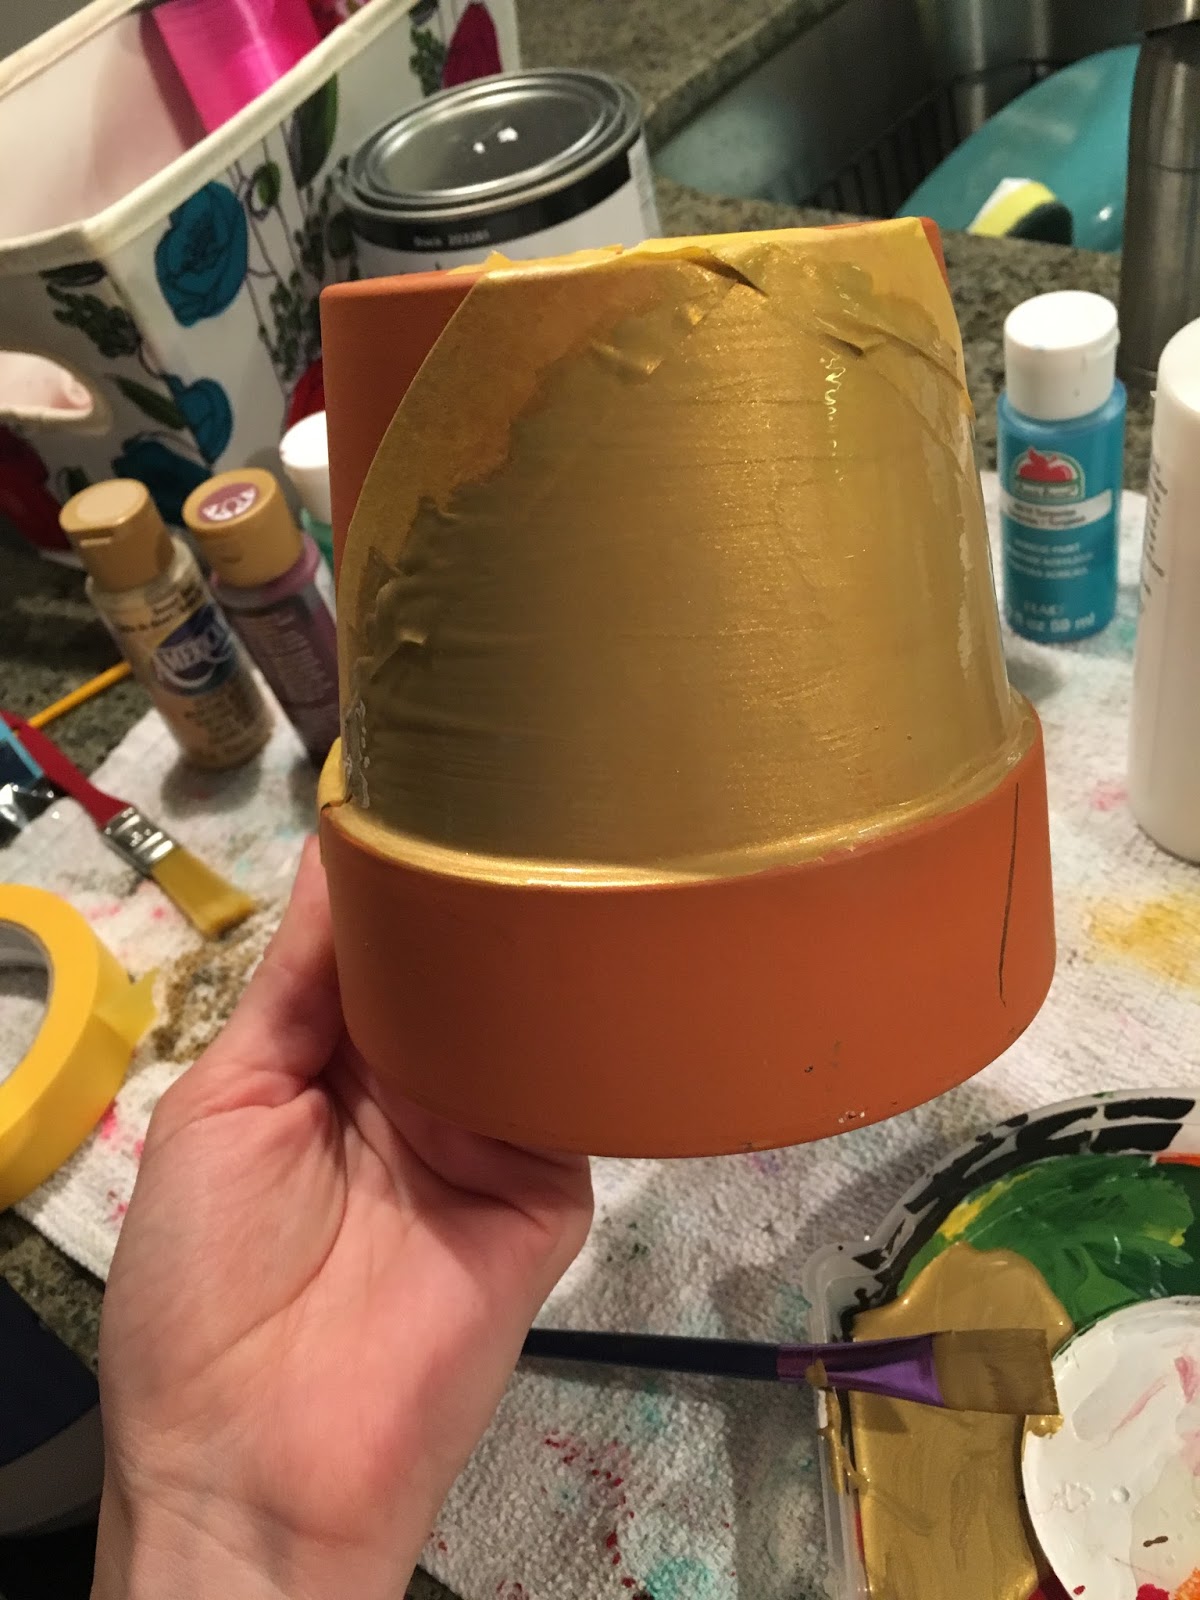
One of the fun parts about succulents, is you can use just about any type of container to pot them in. I have plants in traditional clay pots, cute bright glass pots, wooden boxes, old candle holders and mason jars. But once again, you must have a drainage hole OR layer gravel at the bottom to give your plants proper drainage. TJ Max and the Dollar Store are great places to score on cheap containers to plant in. Or if you want to go with the traditional clay pot, they are super cheap at Lowe's! If the typical orange clay gets old you can always paint them. (hint hint ;) for a future DIY post) You want a pot that is a little bigger than the plant so they have room to grow into. If you are arranging a group of plants be sure to space them out so they don't grow to be overcrowded. If taken care of properly these babies will grow much faster than you think.

Same pot, new plants, but planted correctly!


Soil

This is the exact soil I use for my plants. But almost everything I read about succulents tells me that I need something mixed with perlite or crushed granite. But guess what, I still haven't tried this and I have not had any problems. I'm going to explain my planting process and it may not be pro advice but it works great for me. So take it, tweak it, or leave it.

If there is a drainage hole:
Put down a layer of gravel/small rocks
Mix cactus soil and fine sand (you can buy a small thing in the garden section for like less than $5)
Fill your pot about two thirds of the way
Plant your new babies as desired
Fill remaining gaps with soil
Finish off with a layer of sand that covers the whole top area

If there is no drainage hole:
Same steps except I add a much larger layer of gravel/rocks first then add another layer of sand on top of that
Continue the rest as above

The reason why I go through this crazy process is so that the plants are not left sitting soaked in water for too long.  And that leads me to...


 The top pot is the glued gravel mess that retained too much water.

Watering 


Remember how I said to make sure to have a drainage hole if you buy pre-planted succulents? Well story time on another one of my sad plant deaths. (It's a learning process, ok!!)  My second ever plant purchase was a mixture of a cactus, two succulents, and a Red Devil Euphorbia Trigona. The way it was made they basically glued a layer of gravel on top of the soil and around the plants. Sure it looked super clean, but there was no drainage and so anytime I would water it. the water would just sit at the bottom of the pot accumulating. By the time I realized this was happening I already had lost the tender succulents to rot. On a happy note though the Red Devil survived and I still have it to this day, and it is triple the height!

Succulents are made almost entirely of water already so they do not require daily soakings. The best rule is to make sure your soil is completely bone dry between waterings. This will vary by plants too. My large outdoor Aloe Vera, Red Devil Euphorbia Trigona and Devil's Head  (yes from the story)
get generous soakings about twice a week. These plants are in full sunlight daily and dry up fast. My tiny fragile succulents on the windowsill and by the patio door are only watered on Sundays. Just always make sure they are dry before you water again. If you aren't sure by looking, stick your finger into the soil and feel for moisture. And the good things about these plants is they are good at telling you what they need. If they are plump and firm looking they don't need much water, if they are looking dry and drooping they need some love! Always check the leaves or base of the plant for signs of rot. If it's starting to look like its transparent or yellow or if it starts to get mushy these are not good signs. BUT succulents are magical in that sometimes they can be saved.*


He looks like an Octopus to me haha. 

 Sunlight

 As far as light goes, these guys are happiest in a windowsill or at least relatively near a window. If you want to keep them outside make sure they get a good amount of shade or they will start to sunburn, turn brown and get distressed. If you want them as cute desk decor at work, make sure you are giving them some sunlight now and then. (Like every other day, not once a month.)


See the way the bottom of the Moon Cactus (far left) is yellow? It was that way when I purchased it and if I had done my research I would of realized that was rot.


Tips

If your succulent has rot:
If only the leaves are showing rot, remove the dead ones and refrain from watering until it shows improvement. If there is not improvement you will need to de-pot and check the roots. Remove any gross rotted ones and re-pot into dry soil. Wait for another week at least before watering.
If the base of the plant shows rot then you need to removed the plant. Cut off the roots and all the mushy part. If there is enough plant left you can leave it to dry out for a few days. A callus will begin to form. Once its would is completed callused you can replant it and see if it can be nursed back to health. And if only a few leaves can be saved, you can always try propagating them!

If your cactus is sharp:
You will want to invest in some rubber gloves. Fabric won't work because the needles will just poke through or get stuck in the glove. This has happened to me plenty of times haha.

If your succulent has gnats:
Refrain from watering as long as you possibly can. These stupid annoying bugs like to get into the soil and lay eggs but they can't live in dry soil. This is also another reason I add a layer of sand on top of my soil after I pot. They don't like sand! If things get really bad then I would suggest diatomaceous earth.

Things to avoid:
Spray painted succulents. WHY do stores keep doing this?! IDK but it's a sin to me. Hot pink and neon yellow plants should not be a thing. Additionally, stores love to HOT GLUE FAKE FLOWERS onto plants. Depending on the plant you can sometimes remove them without damage, but if you can just stay away.  

Get creative! Find weird containers or decorate your pots. Pick out plants that appeal to you and add them to your home or office for happy little decorations. No plastic plants! :)


Who needs hot-glued flowers when you have these gorgeous blooms!
Let me know in the comments if you have any tips to add or questions. Happy planting!


Made With Love By The Dutch Lady Designs